
Get Started
Step 2
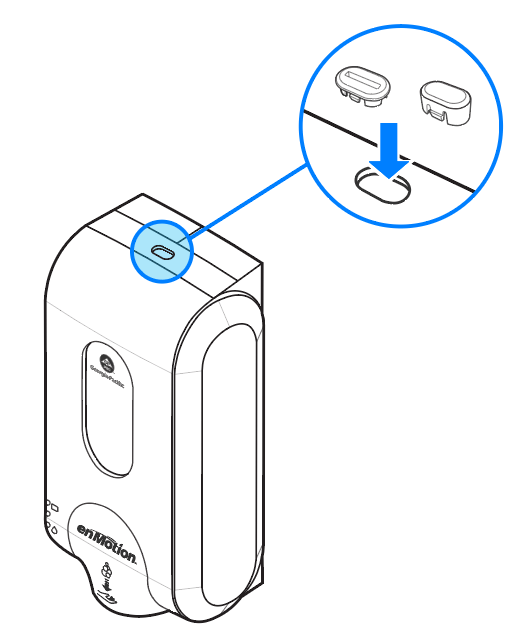
Choose lock option and insert into top of cover.
Push Button Lock
Lock option that open when pushed. No key required to open dispenser.
Key Lock
Lock option that requires the key to open the dispenser.
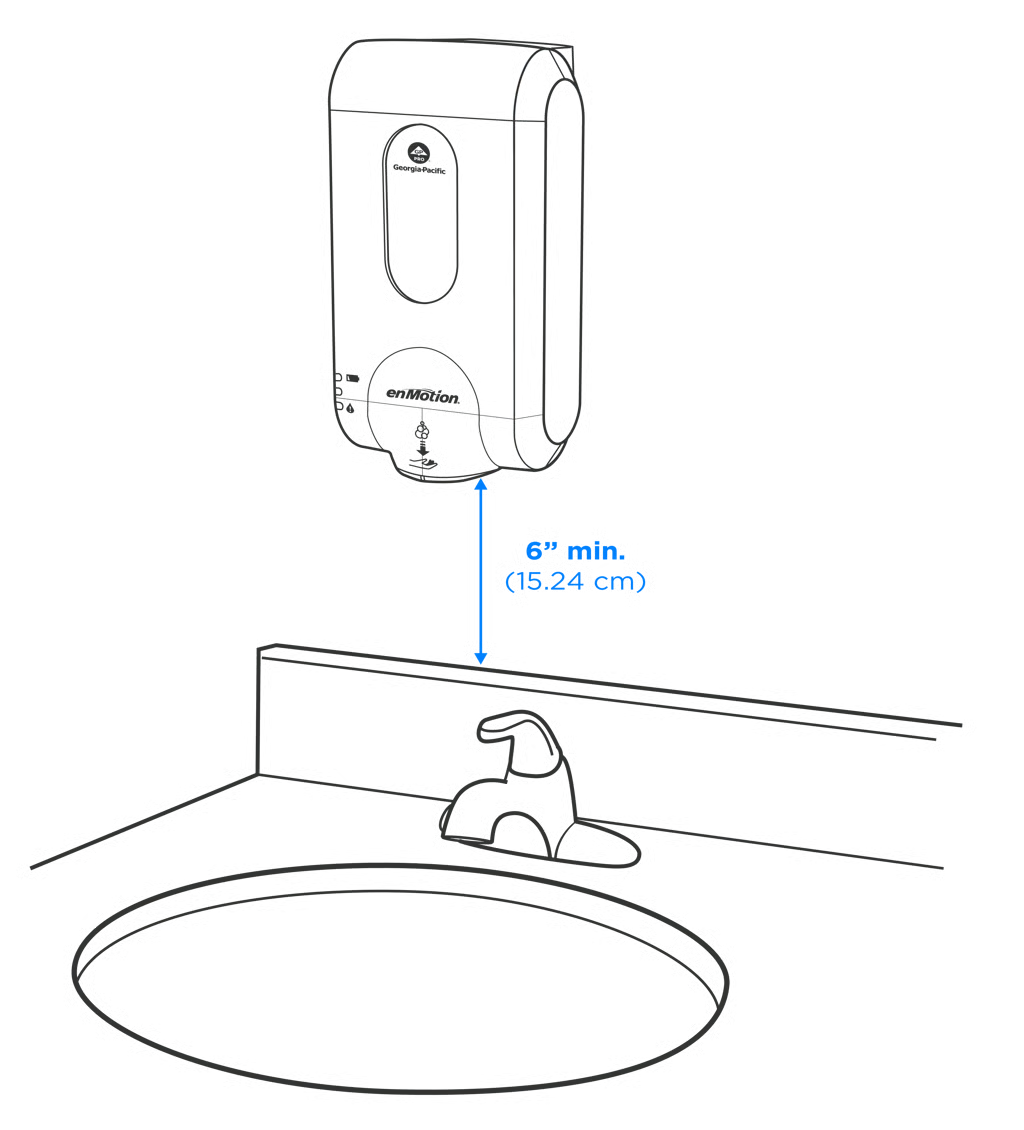
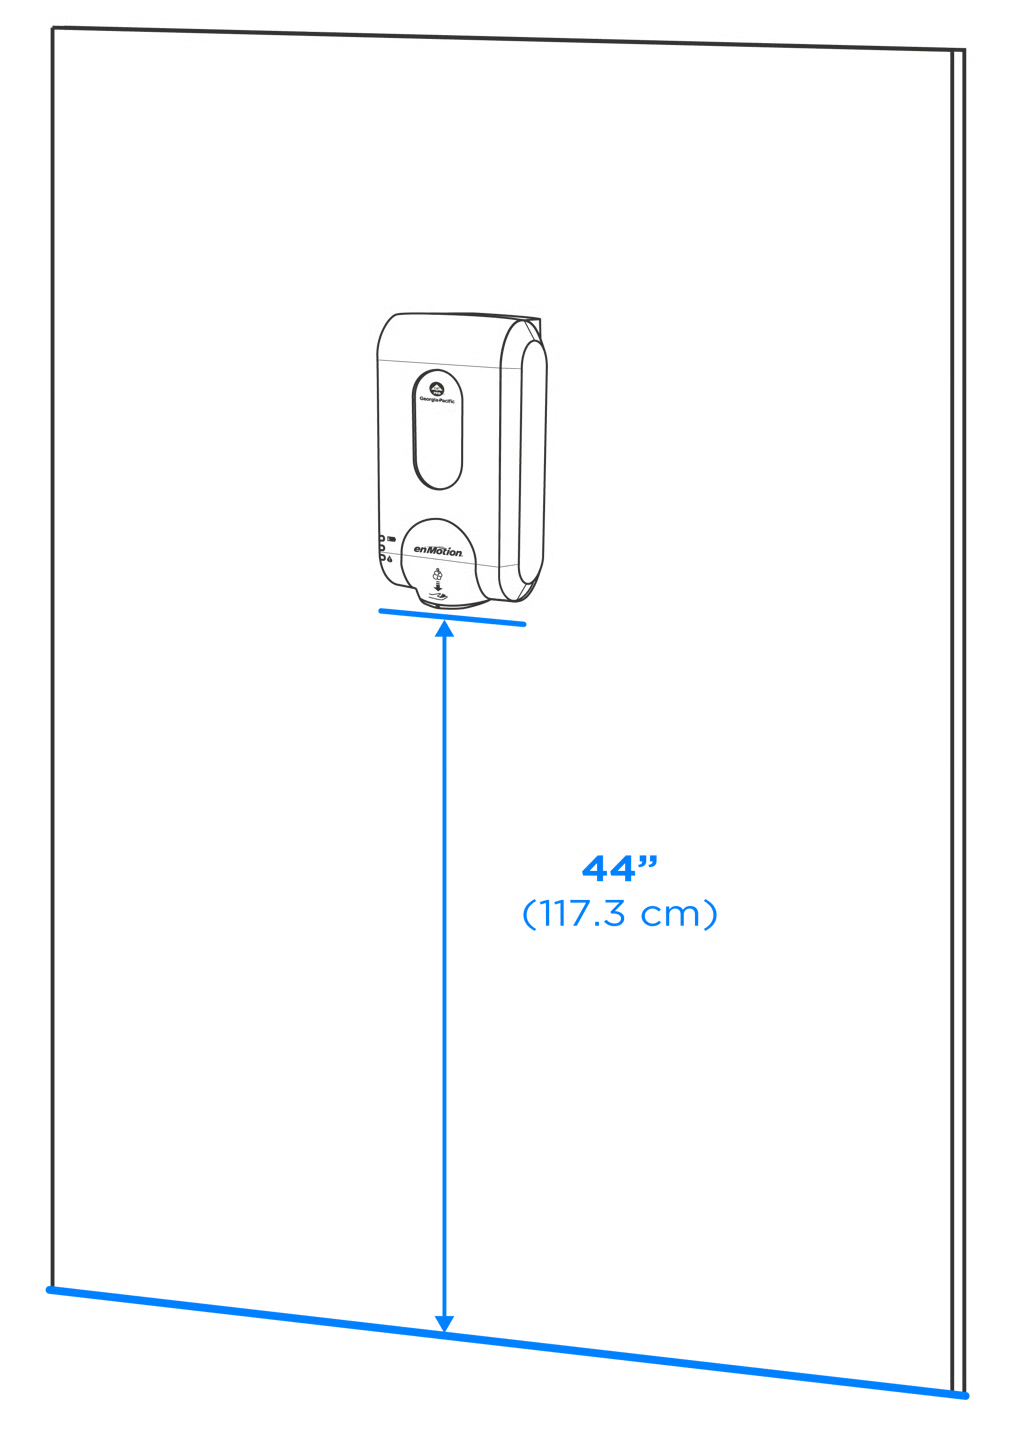
Installation Dimensions
Step 1
A minimum distance of 6" or 15.24 cm should be left between the bottom of dispenser and the counter or backsplash when installed.
Recommended distance of 44" between the bottom of dispenser and the floor when installed.
Note: You can install the mounting bracket with adhesive strips or hardware.
Installation with Adhesive Strips
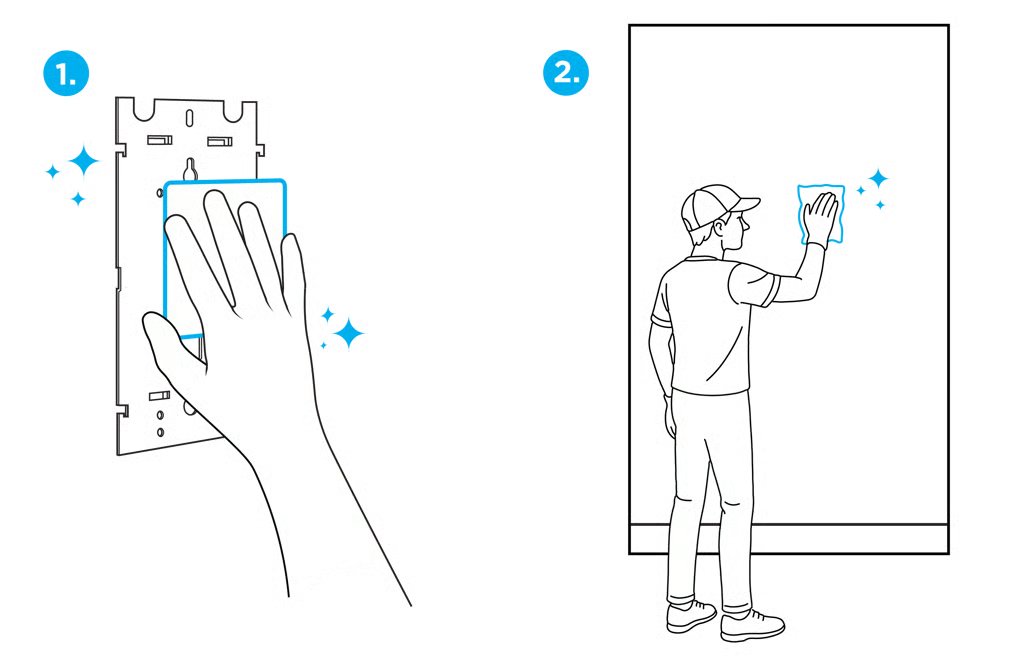
Step 1
Clean bracket and mounting surface with alcohol pad.
Step 2
Adhere tape to back of bracket.

Step 3
Press bracket firmly to wall for 30 seconds.
NOTE: Adhesive must cure for 1 hour before attaching dispenser.
Step 4
Align the dispenser on the bracket and gently push downward until it clicks into place.
Close cover. Installation is complete.

Installation with Hardware
*Hardware not included
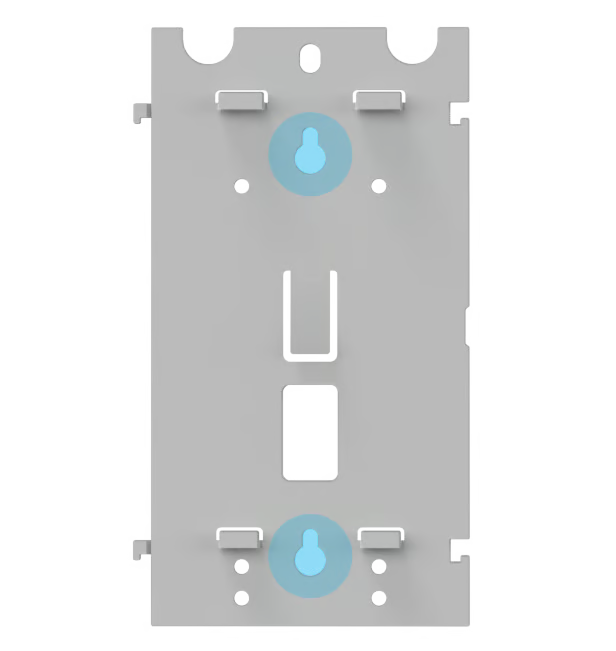
Step 1
Position the bracket so it is level and mark the keyhole locations highlighted in blue.
Step 2
Drill holes and attach bracket using appropriate screws and anchors, not included.
Step 3
Align dispenser on bracket and gently push down until it clicks into place.
Installation is complete.
