


Direct Installation
ADA compliant when installed according to ADA guidelines. ADA compliance is the responsibility of the installer.
Step 1
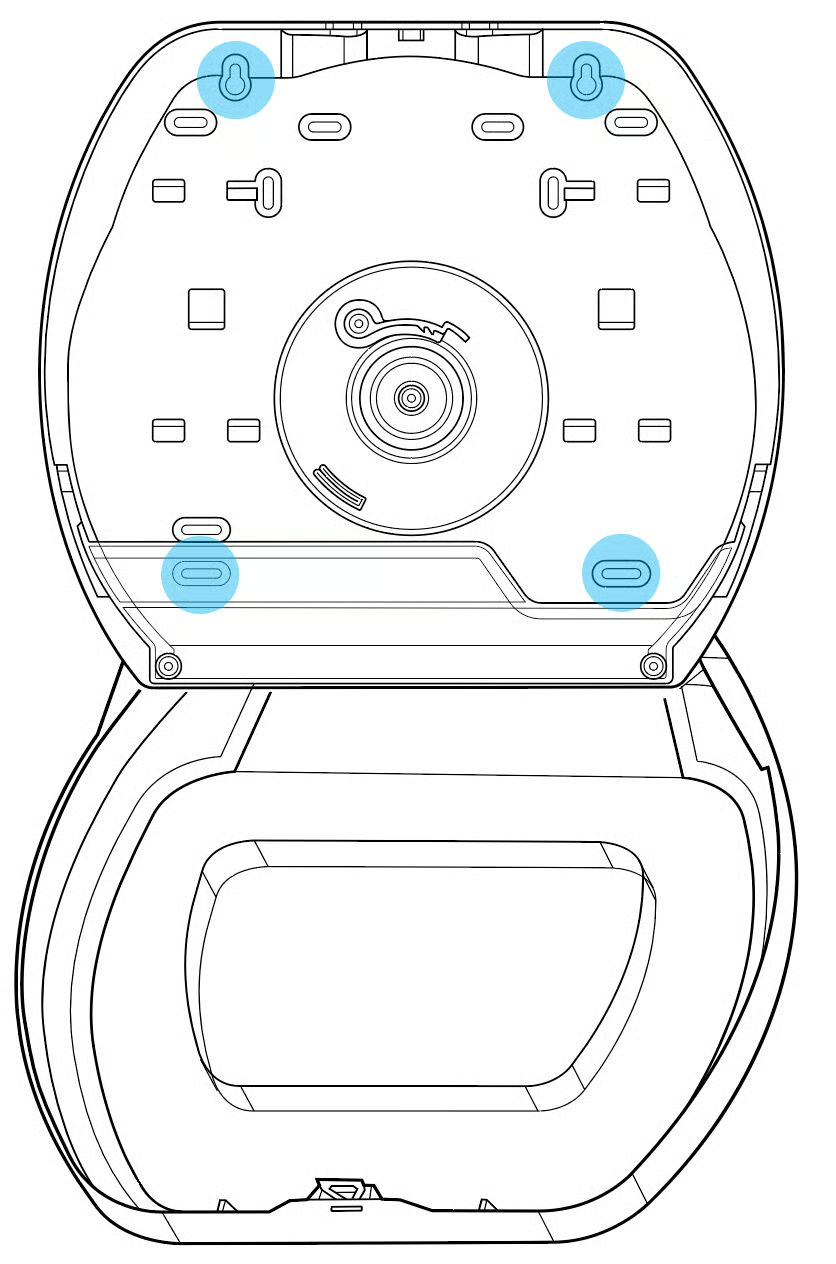
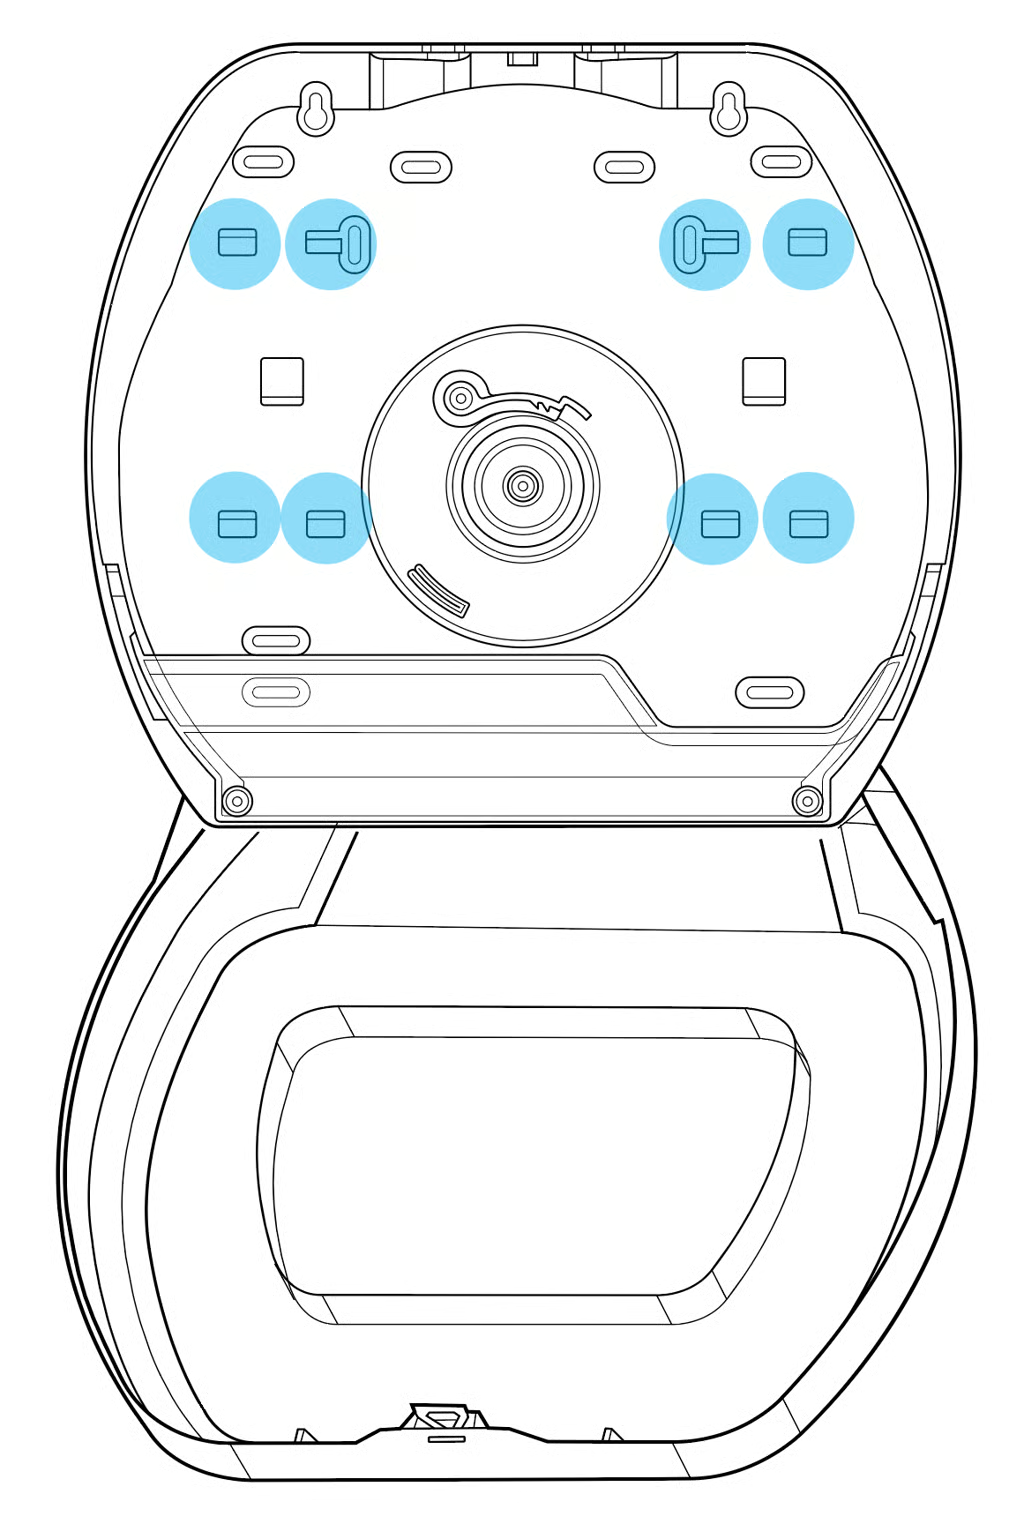
Position unit on wall so that the top is level. With the front cover open, mark screw locations where indicated.
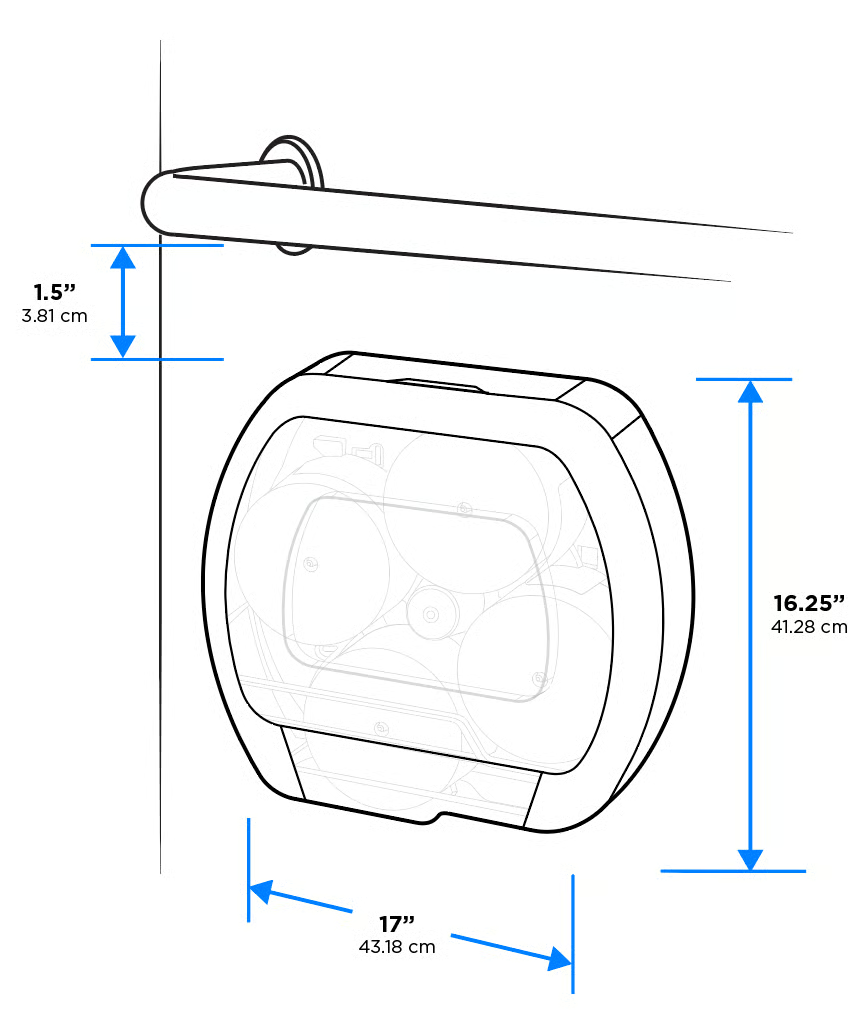
NOTE: Top of the dispenser should be at least 1.5” below any grab bars or other objects to ensure clearance for unlocking the unit with the key
Step 2
Secure unit to wall with four (4) anchored screws appropriate for the type of wall in locations previously marked.
Close cover. Installation is complete.
Bracket Installation
ADA compliant when installed according to ADA guidelines. ADA compliance is the responsibility of the installer.
Step 1
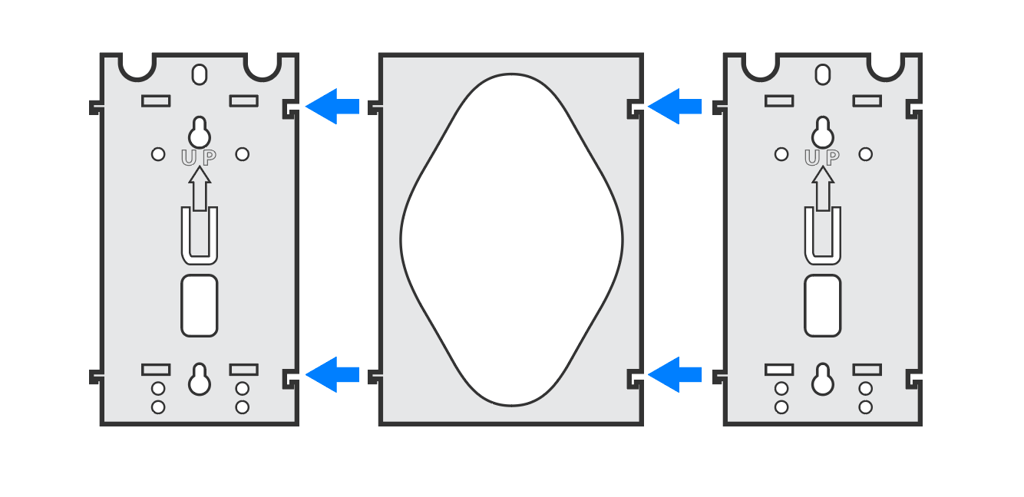
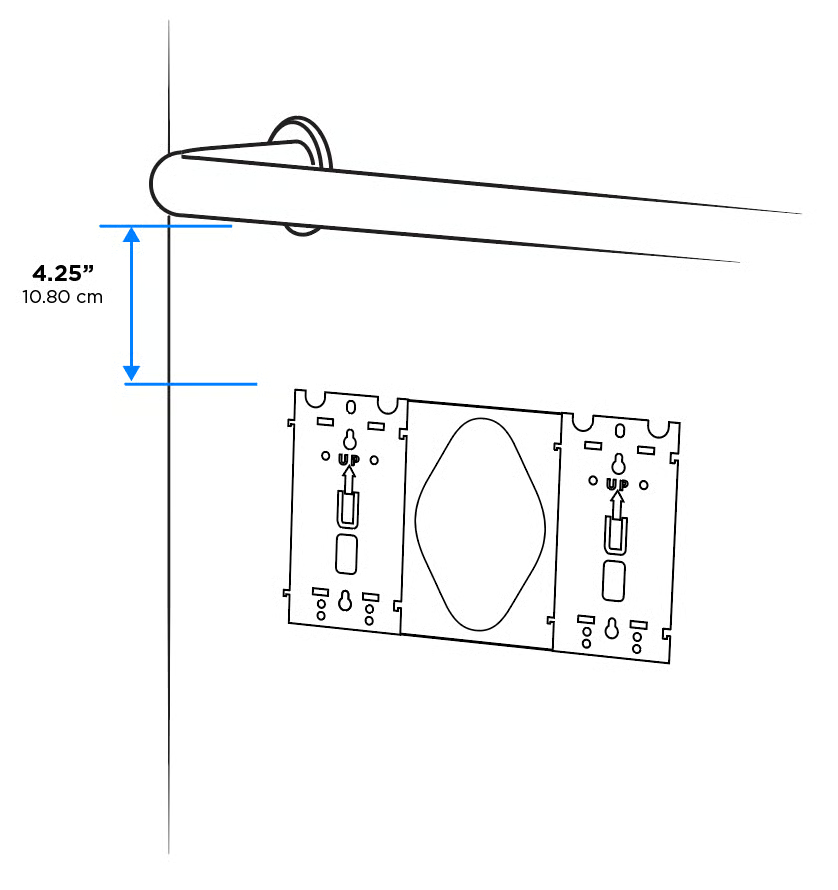
Assemble two (2) mounting brackets (#54019 sold separately) by connecting the sides as shown.
For accessories or replacement components, please call: 1-866-HELLOGP (1-866-435-5647).
Step 2
With top level and the arrows on the bracket pointing up, secure assembled bracket to wall with four anchored screws using the keyhole slots indicated.
Note: Top of the bracket should be at least 3.5” below any grab bars to ensure hand clearance.
Step 3
Fit dispenser on bracket engaging all clips as indicated. Lock into place by gently pulling down until it clicks into place.